티스토리 뷰


개발환경
OS : MacOS
Node : v20.15.0 (LTS)
npm : v10.7.0
npx : v10.7.0
nuxt : 3.12.3
Spring Boot : 3.1.8
JAVA17
1. 사전 작업 (Node설치하기)
Node 버전이 18.0.0 이상이면 2번으로 바로 넘어가 주시면 됩니다.

NodeJs 설치하기
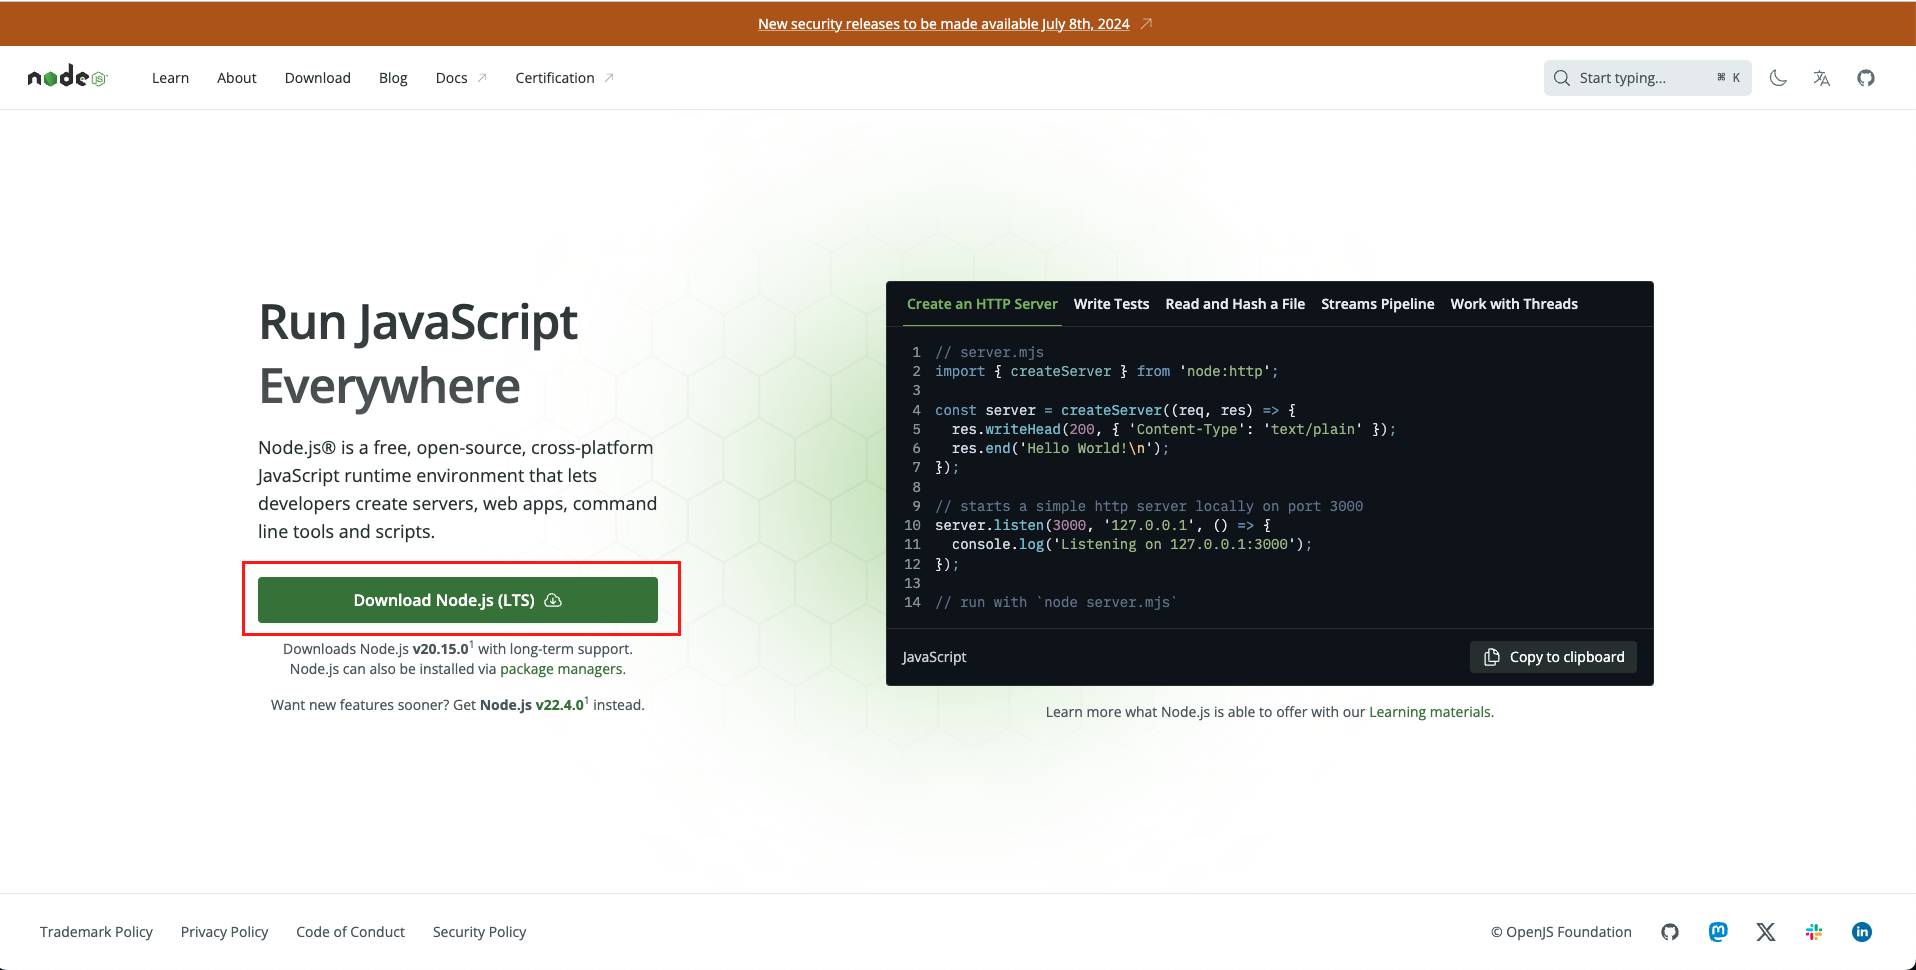
아래 홈페이지에 접속해 node 18.0.0 버전 이상으로 설치해주시면 됩니다.
https://nodejs.org/en/ : NodeJs 설치 홈페이지
Node.js — Run JavaScript Everywhere
Node.js® is a JavaScript runtime built on Chrome's V8 JavaScript engine.
nodejs.org
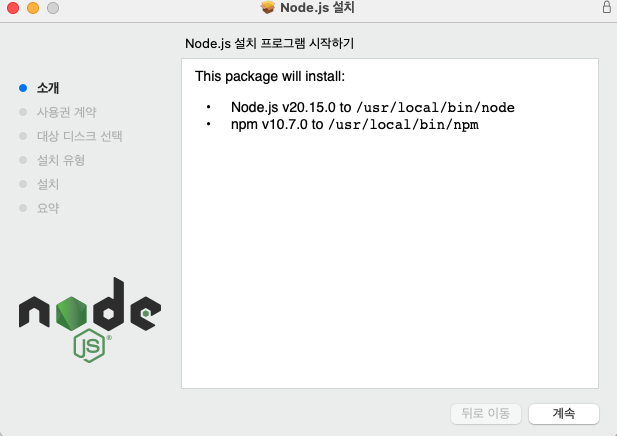
설치 완료 확인하기
설치가 완료 되었으면 터미널을 열고 확인을 해봅시다.
node -v와 npm -version와 npm ls -g을 작성하여 아래와 같이 뜨는지 확인합니다.
$ node -v
>> v20.15.0

$ npm -v
>> 10.7.0

$ npx -v
>> 10.7.0

$ npm ls -g
>> /usr/local/lib
   ├── corepack@0.28.1
   └── npm@10.7.0
Tip) npm ls -g 명령어 실행 중 npm error enoent ENOENT : no such file or directory 에러가 발생했을 경우
$ npm config set prefix /usr/local
# prefix를 /usr/local로 변경합니다.

$ export PATH="/usr/local/bin:$PATH"
# 변경된 prefix 설정을 적용하기 위해 환경 변수를 설정합니다.

$ npm ls -g
>> /usr/local/lib
   ├── corepack@0.28.1
   └── npm@10.7.0
# 다시 확인합니다.
npx란
Node.js 환경에서 실행 가능한 패키지 실행기로, npm 패키지를 설치하지 않고도 실행할 수 있도록 도와주는 도구입니다.
npm 5.2.0부터 기본으로 제공됩니다!
2. Nuxt3 설치
Nust 공식 홈페이지 : https://nuxt.com/
Nuxt: The Intuitive Vue Framework
Nuxt is an open source framework that makes web development intuitive and powerful. Create performant and production-grade full-stack web apps and websites with confidence.
nuxt.com
위치 이동
Mac에서 터미널을 열어서 cd (Change Directory)를 이용해서 프로젝트를 생성하고자 하는 폴더 디렉토리로 가주면 됩니다.
이동하다가 모르겠으면 ls (list)를 이용해서 현재 파일, 디렉토리 목록을 나열해서 봐주시기 바랍니다.
# 예시) cd [폴더]/[폴더]
$ cd study/nuxt

# 현재 위치 파일 목록보기
$ ls
프로젝트 생성
이제 npx를 이용하여 프로젝트를 생성해 보도록 하겠습니다.
# 예시) npx nuxi@latest init [프로젝트 이름]
$ npx nuxi@latest init myStudyNuxt-proejct
package manager 선택
저는 npm이 좀더 익숙하여서 npm으로 선택하였습니다.
선택하면 바로 설치가 됩니다.

깃 레파지토리 생성 선택
저는 현재 깃은 필요없어서 No로 선택하였습니다.

3. 설치완료
설치하여 아래와 같이 출력되었습니다.
그럼 서버를 실행하고 싶다면 아래와 같은 명령어를 해주시기 바랍니다.
# 순서1 예시) cd [프로젝트명]
$ cd myStudyNuxt-project

# 순서2 서버 시작
$ npm run dev
프로젝트 구조
현재 이 폴더보다 더 많이 많이 생성할 수 있습니다.
공식 홈페이지에서 어떤 폴더는 어떠한 성격을 가지는지 한번 확인 해주시는 것도 좋은 것 같습니다.
myStudyNuxt-project
├── .nuxt				# Nuxt 빌드와 관련된 디렉토리 (실행 중에 생성됨)
├── node_modules			# npm 패키지들
├── public				# 정적 파일 디렉토리
├── server				# 서버 사이드 렌더링(SSR) 관련 코드
├── .gitignore				# Git 무시 설정 파일
├── app.vue				# Nuxt 애플리케이션의 루트 Vue 컴포넌트
├── nuxt.config.ts			# Nuxt 애플리케이션의 설정 파일
├── package-lock.json			# npm 패키지의 정확한 버전과 의존성 트리를 기록하는 파일
├── package.json			# npm 패키지 관리 파일
├── README.md				# 프로젝트의 설명과 사용 방법을 기록하는 마크다운 파일
└── tsconfig.json			# TypeScript 프로젝트의 설정 파일
4. 서버실행

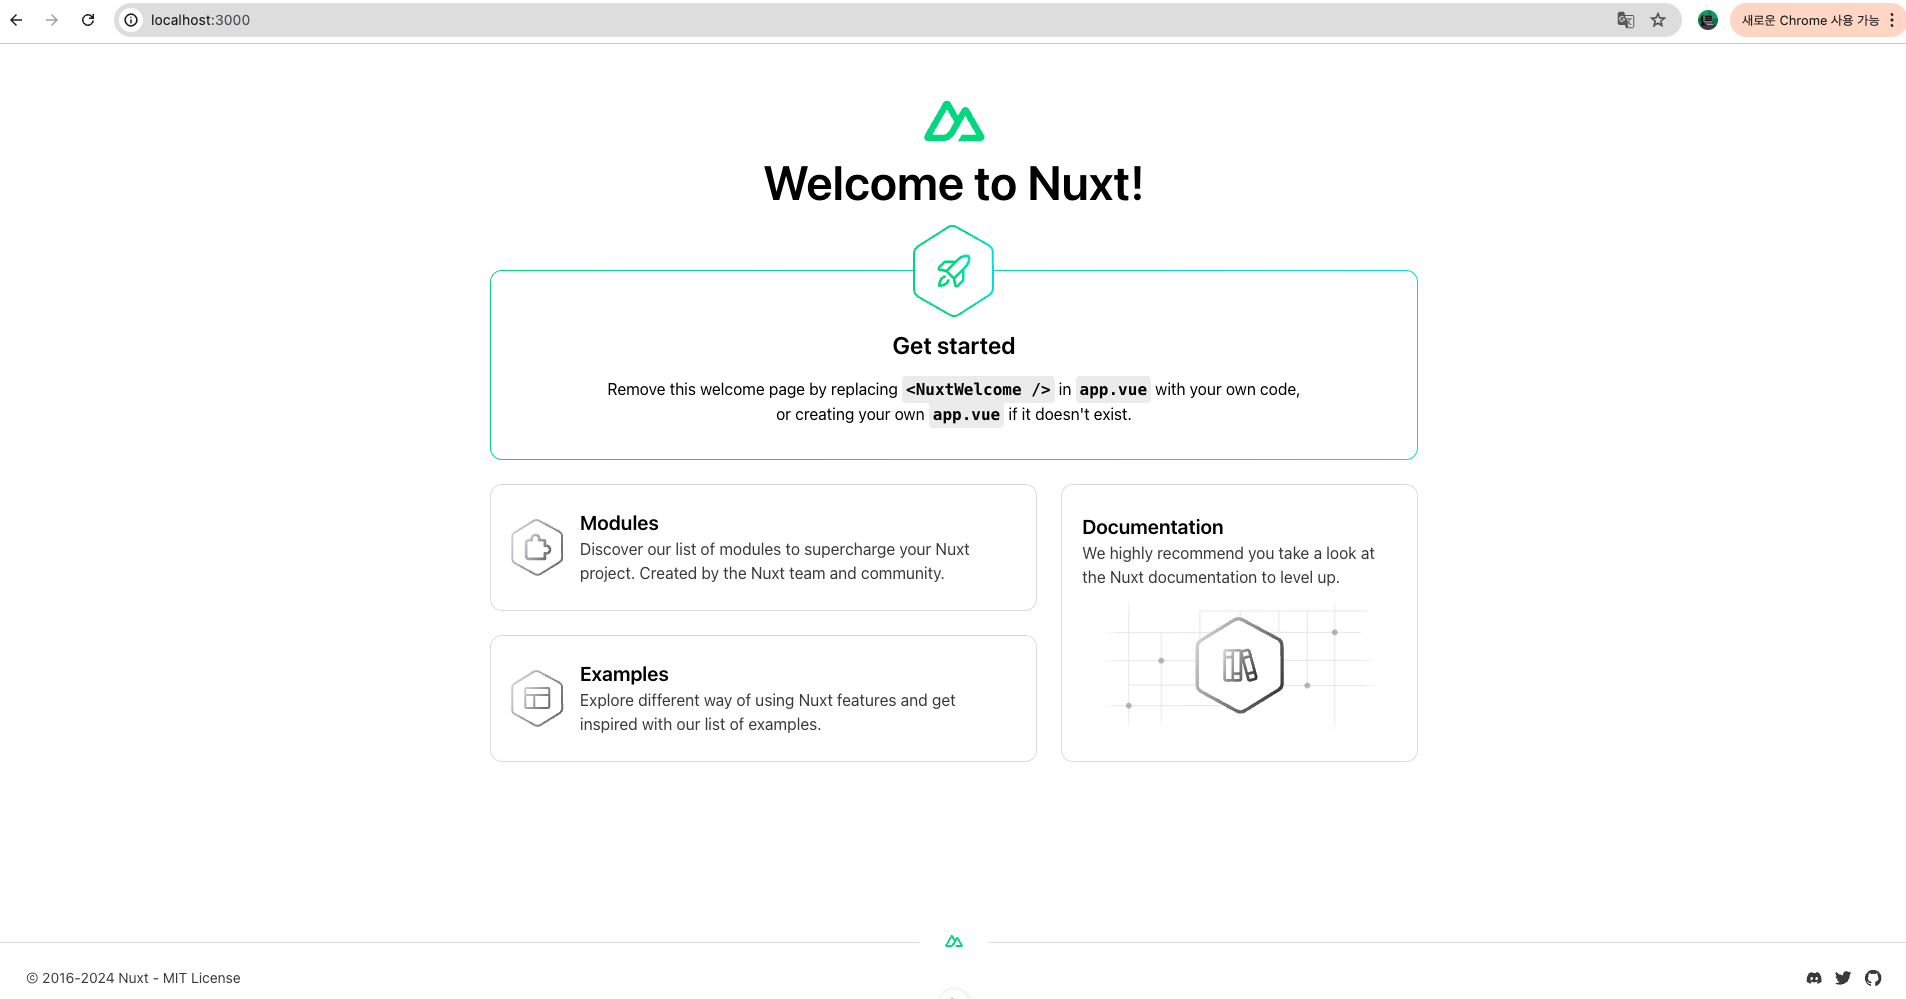
서버가 실행되 었다는 문구가 나왔으니 localhost:3000 에 들어가 보시길 바랍니다.
5. UI 및 템플릿 생성
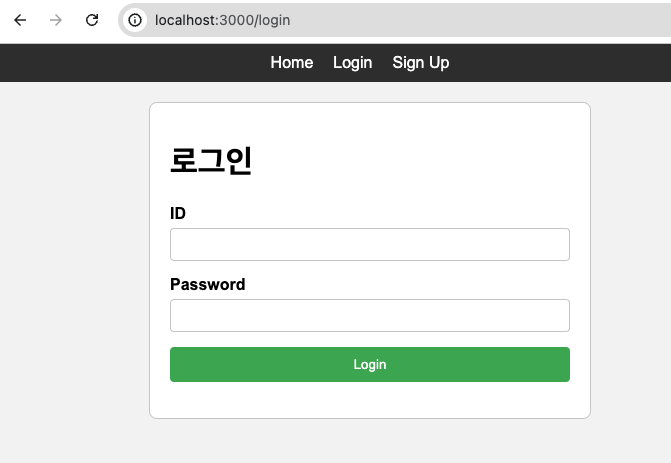
ts, vue를 잘 몰라서 챗대리님에게 부탁하게 되었습니다.
앞으로 꼭 공부하여 결과물을 올려보도록 하겠습니다.
현재 구조
myStudyNuxt-project
├── public					# 정적 파일 디렉토리
├	└── css
├	      └── main.css
├── pages					# 페이지
├	└── login.vue
├── app.vue					# Nuxt 애플리케이션의 루트 Vue 컴포넌트
└── nuxt.config.ts				# Nuxt 애플리케이션의 설정 파일

// 중간 파일들은 현재 여기선 생략으로 보이겠습니다.
코드가 길어서 더보기 처리하였습니다.
app.vue
<template>
  <div>
    <header>
      <nav>
        <ul>
          <li><NuxtLink to="/">Home</NuxtLink></li>
          <li><NuxtLink to="/login">Login</NuxtLink></li>
          <li><NuxtLink to="/signup">Sign Up</NuxtLink></li>
        </ul>
      </nav>
    </header>
    <main>
      <NuxtPage />
    </main>
  </div>
</template>
pages/login.vue
<script setup lang="ts">
import { ref } from 'vue'

const username = ref<string>('');
const password = ref<string>('');
const responseMessage = ref<string>('');

const handleLogin = async (): Promise<void> => {
  console.log(username.value , password.value);
  try {
    const response = await fetch('http://localhost:8080/api/login', {
      method: 'POST',
      headers: {
        'Content-Type': 'application/json'
      },
      body: JSON.stringify({
        username: username.value,
        password: password.value
      })
    });

    const data = await response.json();
    if (data.success) {
      responseMessage.value = 'Login successful!';
      // 로그인 성공 시, 토큰 저장 및 리다이렉션 등 처리
    } else {
      responseMessage.value = 'Login failed: ' + (data.message || 'Unknown error');
    }
  } catch (error:any) {
    responseMessage.value = 'An error occurred: ' + error?.message;
  }
}
</script>

<template>
  <div class="form-container">
    <h1>로그인</h1>
    <form @submit.prevent="handleLogin">
      <div class="form-group">
        <label for="username">ID</label>
        <input type="text" id="username" v-model="username" required />
      </div>
      <div class="form-group">
        <label for="password">Password</label>
        <input type="password" id="password" v-model="password" required />
      </div>
      <div class="form-group">
        <button type="submit">Login</button>
      </div>
    </form>
    <p>{{ responseMessage }}</p>
  </div>
</template>
public/css/main.css
/* Global styles */
body {
  font-family: Arial, sans-serif;
  margin: 0;
  padding: 0;
  background-color: #f4f4f4;
}

header {
  background-color: #333;
  padding: 10px 0;
  color: white;
}

nav ul {
  list-style-type: none;
  margin: 0;
  padding: 0;
  text-align: center;
}

nav ul li {
  display: inline;
  margin-right: 20px;
}

nav ul li a {
  color: white;
  text-decoration: none;
}

nav ul li a:hover {
  text-decoration: underline;
}

main {
  padding: 20px;
}

.form-container {
  max-width: 400px;
  margin: 0 auto;
  padding: 20px;
  border: 1px solid #ccc;
  border-radius: 8px;
  background-color: #fff;
}

.form-group {
  margin-bottom: 15px;
}

label {
  display: block;
  margin-bottom: 5px;
  font-weight: bold;
}

input {
  width: 100%;
  padding: 8px;
  box-sizing: border-box;
  border: 1px solid #ccc;
  border-radius: 4px;
}

button {
  width: 100%;
  padding: 10px;
  background-color: #4CAF50;
  color: white;
  border: none;
  border-radius: 4px;
  cursor: pointer;
}

button:hover {
  background-color: #45a049;
}

p {
  text-align: center;
  color: red;
  margin-top: 10px;
}

.text-center{
  text-align: center;
}

.logo {
  font-size: 1.5em;
  font-weight: bold;
}
6. Nuxt3 프록시 설정
Nuxt3에서 API 프록시 설정을 하려면 "@nuxtjs/proxy" 모듈을 사용하실 수 없습니다.
왜?! Nuxt 2와는 다른 모듈 생태계를 가지고 있으며 Nuxt 3는 새로운 아키텍처와 모듈 시스템을 도입했기 때문에 호환이 안될 확률이 있다고 합니다.
대신 Vite를 기본 빌드 도구로 사용하므로 Vite의 프록시 설정을 활용할 수 있습니다.
Nuxt는 3000번 포트번호, Spring은 8080 포트번호를 사용하기 때문에 아래와 같이 nuxt.config.ts 파일에 Vite 프록시 설정 추가하시면 됩니다.
nuxt.config.ts
// nuxt.config.ts
export default defineNuxtConfig({
  compatibilityDate: '2024-04-03',
  devtools: { enabled: true },
  css: [
    '@/public/css/main.css'
  ],
  vite: {
    server: {
      proxy: {
        '/api': {
          target: 'http://localhost:8080', // 실제 백엔드 서버 주소
          changeOrigin: true,
        },
      },
    },
  },
})
7. Spring CORS 설정
백단인 Spring은 yml에 설정을 정의해 두고 Config에 @Value로 가져와서 CORS설정하는 것을 알려드리겠습니다.
현재 아래와 같이 프로젝트 구조를 잡고 보여드리겠습니다.
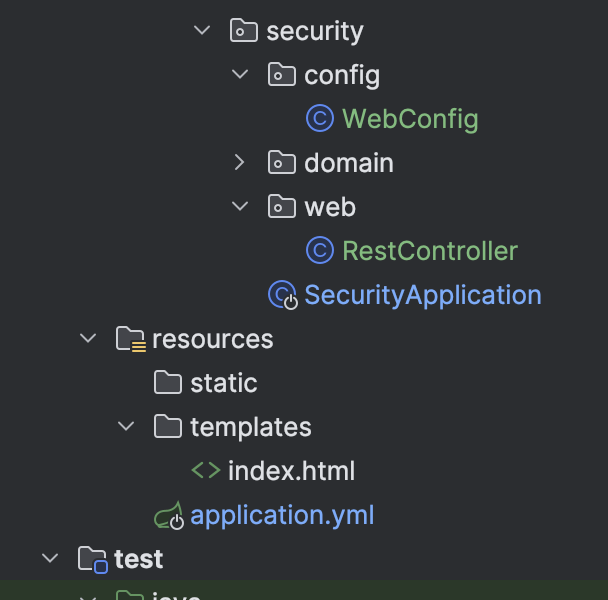
application.yml
spring:
  security:
    cors:
      allowed-origins: "http://localhost:3000"
      allowed-methods: "GET,POST,PUT,DELETE,OPTIONS"
WebConfig.java
import org.springframework.beans.factory.annotation.Value;
import org.springframework.context.annotation.Configuration;
import org.springframework.web.servlet.config.annotation.CorsRegistry;
import org.springframework.web.servlet.config.annotation.WebMvcConfigurer;

@Configuration
public class WebConfig implements WebMvcConfigurer {

    @Value("${spring.security.cors.allowed-origins}")
    private String  ALLOW_CROSS_ORIGIN_DOMAIN;

    @Value("${spring.security.cors.allowed-methods}")
    private String[] ALLOW_METHODS;

    @Override
    public void addCorsMappings(CorsRegistry registry) {
        registry.addMapping("/api/**")
                .allowedOrigins(ALLOW_CROSS_ORIGIN_DOMAIN)
                .allowedMethods(ALLOW_METHODS)
                .allowedHeaders("*")
                .allowCredentials(true);
    }
}
RestController
import lombok.extern.slf4j.Slf4j;
import org.springframework.web.bind.annotation.*;

@Slf4j
@org.springframework.web.bind.annotation.RestController
@RequestMapping("/api")
public class RestController {

    @PostMapping("/login")
    public String login(@RequestBody String data){
        log.info(data);

        return data;
    }
}
8. 통신!!
자자 페이지로 이동해서 로그인 데이터를 날려 보겠습니다.
두근두근
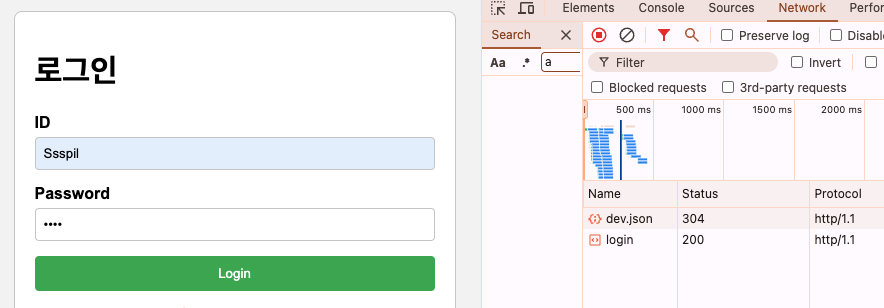

잘 도착하는 것을 알 수 있고 이렇게 Front, Back 통신하게 만드는 것을 알아보았습니다.
다음부터는 Spring Security를 적용하여 인증, 인가, jwt 등 배워보도록 하겠습니다.

감사합니다.
'개발환경' 카테고리의 다른 글
| [개발환경] 환경변수 설정하기 : 각 운영체제 MacOS, Windows11, EC2(ubuntu)에서 안전하게 관리하는 방법 (0) | 2024.12.02 |
|---|---|
| [개발환경] MacOS Docker로 Redis 설정 및 Spring Boot 3 연동 가이드 (0) | 2024.08.26 |
| [개발환경] 윈도우11에 NginX로 Reverse Proxy와 로드 밸런싱 구성하기 (4) | 2024.07.01 |
| [개발환경] npm vs yarn vs pnpm (0) | 2024.05.05 |
| [개발환경] Spring Boot3과 Docker로 띄운 PostgreSQL16 연결하기 (0) | 2024.04.03 |
- Total
- Today
- Yesterday
- Spring Security
- 네트워크
- 프로세스
- 알고리즘
- 개발환경
- CI/CD
- 시간 객체
- aws
- DBeaver
- 코딩테스트
- 개발
- 그리디
- 소셜로그인
- 개발블로그
- Flutter
- 데이터 베이스
- 카카오 로그인
- JavaScript
- spring
- java
- 트랜잭션
- 개발자
- 멀티모듈
- JPA 페이징
- 계단 오르기
- BFS
- Fetch
- 디자인패턴
- Front
- 깃허브 액션
| 일 | 월 | 화 | 수 | 목 | 금 | 토 |
|---|---|---|---|---|---|---|
| 1 | 2 | 3 | 4 | 5 | 6 | 7 |
| 8 | 9 | 10 | 11 | 12 | 13 | 14 |
| 15 | 16 | 17 | 18 | 19 | 20 | 21 |
| 22 | 23 | 24 | 25 | 26 | 27 | 28 |

